instruction
bracelet with motifs no. 1 13/08/2013

materials
-
polymer clay 20 g: dark blue
- motifs from newspapers, trading cards etc.
- two approx. 0.8 mm elastic/rubber band for bracelets
tools
-
pasta machine
- acrylic rod
- two polymer clay knives
- 1 cm round cookie cutter
- four 4 mm high chips or coins
- two rulers
- board or tile
- hand drill with approx. 1 mm drill attachment
- nail art dotting brush
- cling film
- sandpaper
- craft glue
- pencil
- scissors
costs
- polymer clay 20 g = approx. €1.00
working time
-
1 1/2 hours
instruction
1. First, roll out a plate on the thickest setting of the pasta machine. Then fold it in half and carefully roll over it with an acrylic rod so that the sides connect better. The double layered polymer clay should have a thickness of about 5 mm.
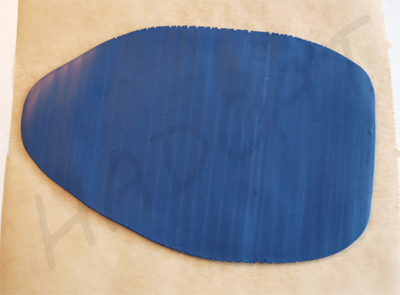

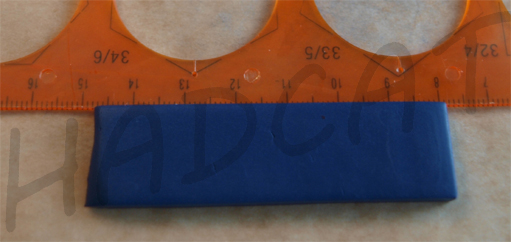
2. Make a straight cut where the polymer clay is doubled.

3. Make a second cut parallel to the first at a distance of 2 cm. Tip: Use the polymer clay knife to measure the distance, as it has exactly the right dimensions of 2 cm.
4. Cut off one end. This is the result:
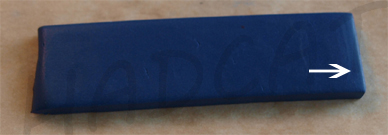
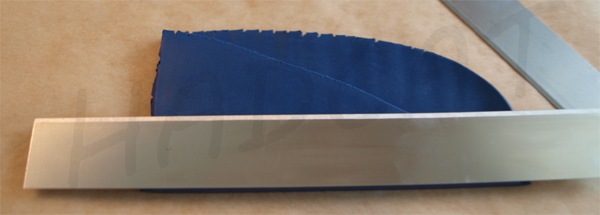
5. Divide the block into 1 cm wide pieces. You can use rulers to do this.

6. Then you get this:

7. Roll out a new plate on the thinnest setting of the pasta machine. Put cling film on the clay so that the it does not stick to the cookie cutter when you cut it out.


8. Use a cookie cutter with a diameter of 1 cm to cut circles out of the clay. You will need double the amount of circles as rectangular beads. For
my bracelet width, there are 11 rectangular beads and 22 circles. Depending on how thick your bracelet is, you will need more or fewer beads or circles.
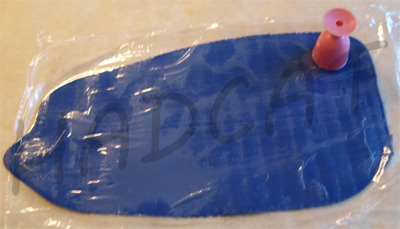

9. Form small balls out of them and place them on a baking paper with some distance between them. So that all the beads are the same width at the end, place a 4 mm high chip or coin at the four corners of the baking paper. Now place a second piece of baking paper over the beads and flatten them with a boards or tile.
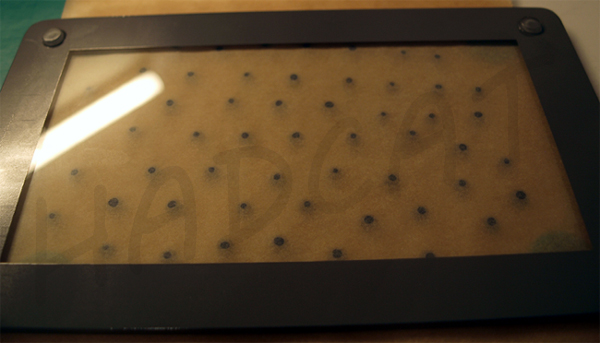
10. This is the result:

The size of the clay beads changed a bit. But this is not a problem. From the amount I made I was able to make several bracelets at once. To do this, I simply used the same size beads for on band.
11. Bake everything according to the manufacturer's instructions. If you want to cool the beads quickly, you can rinse them briefly with cold water
after baking. You should wait a little before continuing. Some types of polymer clay may become too fragile, like the transparent type.
12. Next, sand the back of the rectangular beads with sandpaper. That way they won't scratch the skin later.

13. Drill holes into the rectangular and round beads with a hand drill. For the round beads, simply drill through the center. For the rectangular beads, mark the holes beforehand. I have measured about 4 mm from the right and left edge.

14. The next step is to create the oval images with which you want to decorate your bracelet. For this you choose beautiful motifs. You can find
them in magazines, calendars or old trading cards. You can also print out the pictures. Use the smallest printing format, which for me was the contact prints format.
I used the leftovers from my homemade memory game from trading cards.

15. First, draw an oval template on a piece of cardboard. You can do this by eye.

16. Now use the template to cut out oval motifs of the same size from your pictures. I used a sharpie for this, because a pencil is not visible on the cards.

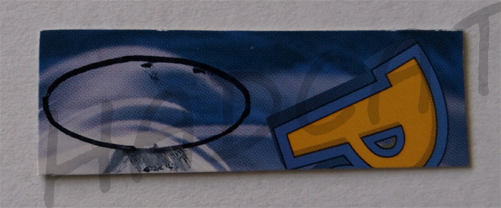


17. Glue the motif onto a rectangular bead. To do this, put a small bit of craft glue on the bead and press the motif on. Let the whole thing dry until the glue has hardened. To seal the motif, apply a large bit of craft glue onto it and spread it neatly over the oval shape. You can use some twisted kitchen roll paper to do this.

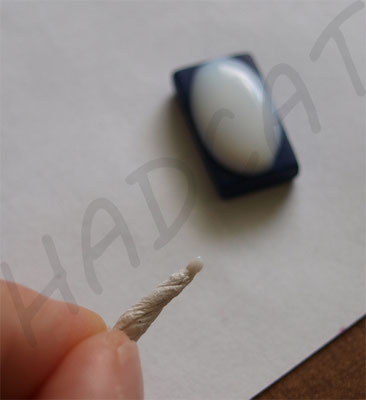
I used a nail art dotting brush to help me push down the motif and to get out the larger air bubbles. This tool is ideal for modeling polymer clay and one of my favourite tools.


18. Allow everything to dry. This can take about a day.
19. Alternately thread the round and rectangular beads onto the rubber bands and knot the ends.
Your bracelet is ready.